NEW! PR1050X Scan Frame Upgrade Kit – Part 1
The new PR1050X Scan Frame Upgrade Kit is a great addition to your PR1050X machine. It enables you to convert your own drawings and designs into stitch data without the need for additional software. With the upgrade kit, you can also create your own designs on the machine screen using the many built-in fill stitch, outline stitch and shape options.
Main Features
Scan and convert line art and colour illustrations, import designs via SD card or USB stick, or draw directly onto the LCD screen.
Includes 10 new built-in decorative fill patterns, 60 closed shapes, 30 open shapes, and 5 outline options - satin stitch, straight stitch, triple stitch, candlewicking and chain stitch.
Part 1 - Scanning and converting a line drawing
Attach your drawing or printout to the scan frame using the green magnets to hold it in place.


Attach the scan frame to the machine directly and secure with two screws (remove your embroidery frame arm before doing this)


When you have installed the upgrade kit you will notice a new button appear in the bottom right corner of the screen – My Design Centre.
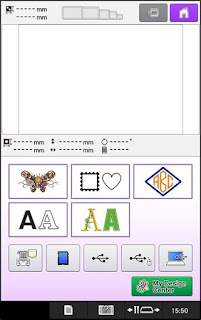
In My Design Centre press the ‘Line’ button at the top of the screen.
There are lots of editing options available, using the buttons in the lower half of the screen which are used for editing a scanned image or drawing directly onto the LCD screen.

If you haven’t already done so, the machine will prompt you to attach a needle plate cover. This black cover is located on your scan frame, it slides out and attaches to the needle plate.


Press ‘Scan’ and the machine will begin scanning the drawing.

After the scanning is complete, crop the image using the red arrows. Then press ‘OK. You can alter the greyscale level if you wish. Then press ‘Set’.


Next use the slider to remove the background image. Zoom in and use the eraser to remove any details that you don’t want to stitch out (such as the writing here).


Once zoomed in move the red box in the small window to change your view.

The next step is to choose your outline style. From the outline settings menu (top page/settings button) select your outline style from the options – satin stitch, straight stitch, triple straight stitch, candlewicking stitch and chain stitch. From here you can also select a different colour.
Then press ‘OK’. Make sure the outline paint pot (top one) is selected, and ‘fill’ the outline with your selected outline style and colour. You may need to select more than one section of the design to change all of the outline areas. Then press ‘Next’.
You can also choose to fill areas here too, to do this use the bottom page/settings button and bottom paint pot.


Here you can see your design and the options you have selected. If you’re happy press ‘Preview’ and then ‘OK’. If you want to do more editing press ‘Cancel’.

You can now see your design converted into stitch data. You can either ‘Return’, save or ‘Set’.

You can edit your new design as you would any other design, change the size, colour, mirror image etc… Press ‘Edit End’ then ‘Embroidery’ when you’re happy and stitch your design out.

Finished!


Main Features
Scan and convert line art and colour illustrations, import designs via SD card or USB stick, or draw directly onto the LCD screen.
Includes 10 new built-in decorative fill patterns, 60 closed shapes, 30 open shapes, and 5 outline options - satin stitch, straight stitch, triple stitch, candlewicking and chain stitch.
Part 1 - Scanning and converting a line drawing
Attach your drawing or printout to the scan frame using the green magnets to hold it in place.
Attach the scan frame to the machine directly and secure with two screws (remove your embroidery frame arm before doing this)
When you have installed the upgrade kit you will notice a new button appear in the bottom right corner of the screen – My Design Centre.

In My Design Centre press the ‘Line’ button at the top of the screen.
There are lots of editing options available, using the buttons in the lower half of the screen which are used for editing a scanned image or drawing directly onto the LCD screen.

If you haven’t already done so, the machine will prompt you to attach a needle plate cover. This black cover is located on your scan frame, it slides out and attaches to the needle plate.
Once the needle plate cover is attached the next screen will offer you the choice of either scanning an image or importing an image such as a JPEG from SD card, USB stick or directly from your computer.

After the scanning is complete, crop the image using the red arrows. Then press ‘OK. You can alter the greyscale level if you wish. Then press ‘Set’.
Next use the slider to remove the background image. Zoom in and use the eraser to remove any details that you don’t want to stitch out (such as the writing here).
Once zoomed in move the red box in the small window to change your view.
The next step is to choose your outline style. From the outline settings menu (top page/settings button) select your outline style from the options – satin stitch, straight stitch, triple straight stitch, candlewicking stitch and chain stitch. From here you can also select a different colour.
Then press ‘OK’. Make sure the outline paint pot (top one) is selected, and ‘fill’ the outline with your selected outline style and colour. You may need to select more than one section of the design to change all of the outline areas. Then press ‘Next’.
You can also choose to fill areas here too, to do this use the bottom page/settings button and bottom paint pot.

Here you can see your design and the options you have selected. If you’re happy press ‘Preview’ and then ‘OK’. If you want to do more editing press ‘Cancel’.
You can now see your design converted into stitch data. You can either ‘Return’, save or ‘Set’.
You can edit your new design as you would any other design, change the size, colour, mirror image etc… Press ‘Edit End’ then ‘Embroidery’ when you’re happy and stitch your design out.
Finished!
This is a really informative article for people who want to develop embroidery skill completely appreciated your blog.
ReplyDeleteHoping to get this in the uk. Looking forward to using it.
ReplyDelete