NEW! PR1050X Scan Frame Upgrade Kit – Part 2
The new PR1050X Scan Frame Upgrade Kit is a great addition to your PR1050X machine. It enables you to convert your own drawings and designs into stitch data without the need for additional software. With the upgrade kit, you can also create your own designs on the machine screen using the many built-in fill stitch, outline stitch and shape options.
In part 1 we looked at how to scan and convert a line drawing. In part 2 we’ll look at the various fill stitch options.
Main Features
Scan and convert line art and colour illustrations, import designs via SD card or USB stick, or draw directly onto the LCD screen.
Includes 10 new built-in decorative fill patterns, 60 closed shapes, 30 open shapes, and 5 outline options - satin stitch, straight stitch, triple stitch, candlewicking and chain stitch.
Using the fill options
Pressing the bottom page/settings button in My Design Centre will take you to your fill or region property options.

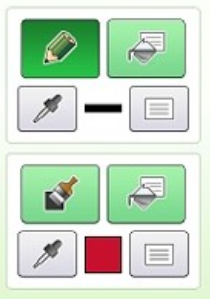
Here you can select different fill stitches like plain fill, stippling and 10 other fill stitch options.

The 10 other fill stitch options are beautiful to work with and would look great on a quilt.

The shapes button will take you to the different shape options available.


There are 60 closed shapes and 30 open shapes. You can also create your own shapes using the outlines of existing embroidery designs either built into the machine or imported.


Create a design by playing with the various shape options and fill stitches, then press ‘Next’
You can alter the settings for each section, for the fill and the outline stitches. You can alter the size, density, spacing, angle etc.
You can also change your chosen fill or outline stitch here.
Then press ‘Preview’ and then ‘Set’.


You can edit your design as you would any other built in or imported embroidery design, change the size, colour, mirror image etc… Press ‘Edit End’ then ‘Embroidery’ when you’re happy.

Then stitch your design out.


Finished!


In part 1 we looked at how to scan and convert a line drawing. In part 2 we’ll look at the various fill stitch options.
Main Features
Scan and convert line art and colour illustrations, import designs via SD card or USB stick, or draw directly onto the LCD screen.
Includes 10 new built-in decorative fill patterns, 60 closed shapes, 30 open shapes, and 5 outline options - satin stitch, straight stitch, triple stitch, candlewicking and chain stitch.
Using the fill options
Pressing the bottom page/settings button in My Design Centre will take you to your fill or region property options.

Here you can select different fill stitches like plain fill, stippling and 10 other fill stitch options.

The 10 other fill stitch options are beautiful to work with and would look great on a quilt.

The shapes button will take you to the different shape options available.
There are 60 closed shapes and 30 open shapes. You can also create your own shapes using the outlines of existing embroidery designs either built into the machine or imported.
Create a design by playing with the various shape options and fill stitches, then press ‘Next’
You can alter the settings for each section, for the fill and the outline stitches. You can alter the size, density, spacing, angle etc.
You can also change your chosen fill or outline stitch here.
Then press ‘Preview’ and then ‘Set’.


You can edit your design as you would any other built in or imported embroidery design, change the size, colour, mirror image etc… Press ‘Edit End’ then ‘Embroidery’ when you’re happy.

Then stitch your design out.


Finished!


Comments
Post a Comment