Sewing the Dream | Chapter 2.5
Yes I know I said I would be talking about other stuff at the end of my last blog but (as is usual for me) I have allowed myself to be sidetracked into more Brother XV/Dream Machine wonderfulness – hence this mini-blog.
I’m talking about the feature on the machine that allows you to make appliqués – or indeed patches – at the press of a button.
I’ve been into making Christmas decorations recently and thought how wonderful it would be if I could use some of the many, many Christmas designs I already have and make them into ornaments for the tree.
Here's the first one still waiting for her hanging loop and some decorative beads. The design is from the wonderful fruBlomgren on Etsy.
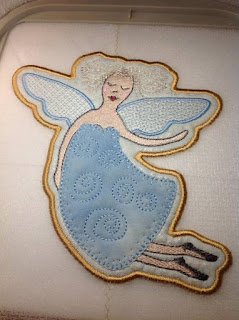
Please ignore the zigzag at the top, that’s where I pieced the stabiliser – yes I really am that mean...
As you can see the satin stitch appliqué follows the line of the design which is pretty and effective, but then I thought how great it would be if I could put my designs into a simple circle or oval or triangle – whatever I fancied.
Well of course with the Brother XV/Dream you can! And this is what I did…
1. Go to Design Centre and select the shape you want from the many shapes available.

2. Resize to fit the design you intend to use.
3. Still in Design Centre, go to the line fill region and select the simple running stitch.
4. Using the bucket icon select the outline.
5. Save in the red arrow pocket in case you need to alter it in the future.

6. Now take it through to Embroidery and save it as a design.
7. Go to the notepad icon at the top of the screen and change the distance between appliqué stitches and the design to zero.
8. In Edit hit the appliqué button (looks like a little shield). You now have a lovely satin stitched frame.

9. Using the ‘add’ feature bring in the design you want to use
10. You will see – just within the satin stitch outline – a single line of straight stitching which marks the frame design you created. You can either stitch this out as an extra decorative touch or skip over it using the +/- button. In fact, when you select the running stitch in Design Centre you have the option of using a single stitch, a triple ‘bean’ stitch, a candlewick stitch (going to try that next!) or a chain stitch.

Bingo! You can now sew out your design as either an appliqué or a patch.

And here it is finished, embroidered on green wool felt, embellished with vintage beads and on my Christmas tree!

This is also a wonderful method to use when creating quilt labels as here I have to say (at the risk of sounding like an advert) you are only limited by your imagination with the Brother XV/Dream Machine!
Now off you go and make some great ornaments, decorations and patches! Go on…. GO!
Until next time….
Angie
Cinnamon Crafts
Isle of Man
Great info, Angie. Thanks for taking your time and effort to pass such good info along to us.
ReplyDeleteThank you Sun! It's my pleasure.
Delete