PE Design 11 Beginners: Using background fill wizard with Julia Ashman

I am completely new to PEDesign Software, but want to learn to take full advantage of my Brother embroidery machine. As an introduction, I decided to pick one feature to focus on to allow
me to become familiar with the layout of the program. My inspiration came from the Background Fill feature, available on the XV.
I will explain the
process and options within the Background Fill Wizard to complete a quick and
easy mini quilted pillow project. I have ensured I have the current version of
the Software, inserted the Software Key and opened the program.
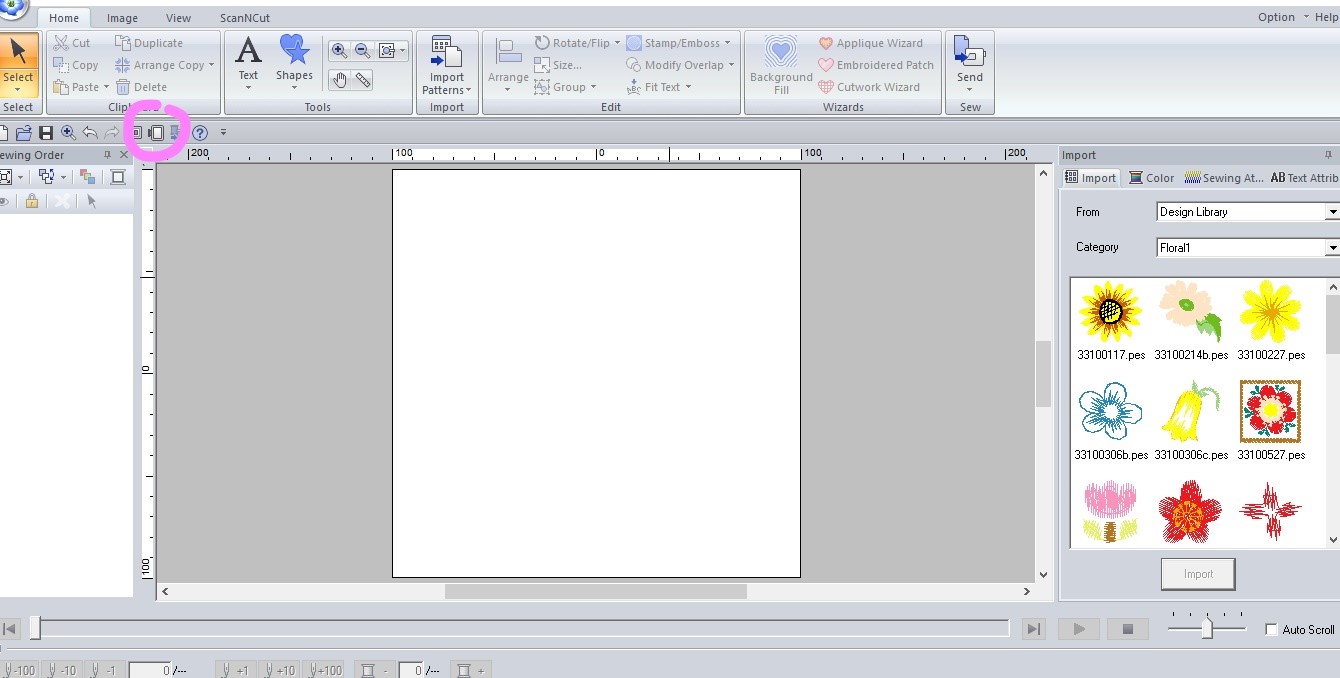
First, you need to
design a template by selecting the hoop size appropriate for the project. The
‘fill’ will completely fill the hoop, so be mindful of your design size and
project requirements. I have selected hoop size 200mm x 200mm as I want to make
square quilted blocks.
From the home tab, select the Shapes button and choose your desired shape. I’m using a square with inverted rounded corners. Draw the shape in the middle of the design area. To get the shape symmetrical use [shift+left mouse key] and drag the shape to the size you want. Then select the applique wizard, click OK to use the pre-set stitches. This wizard automatically creates fabric positioning stitches, tacking down stitches and satin stitches to create a basic applique.
From the home tab, select the Shapes button and choose your desired shape. I’m using a square with inverted rounded corners. Draw the shape in the middle of the design area. To get the shape symmetrical use [shift+left mouse key] and drag the shape to the size you want. Then select the applique wizard, click OK to use the pre-set stitches. This wizard automatically creates fabric positioning stitches, tacking down stitches and satin stitches to create a basic applique.

To centre the shape, in the home menu select Arrange button, and then the bottom option, Move to Center. Alternatively, you can use shortcut key [ctrl+M]
To add a
background fill, again from the home tab select the Background Fill button, which
opens your background fill wizard. Within the Wizard there are four different
menus. Click on the background (white area around your shape) and select a
style of fill, then click next.
The four options
are as follows:
Echo fill

Spacing settings:
Offset spacing - the distance from the object to the first
line of the echo. This distance is then continued between each line of the
echo. I’ve selected 8mm.
Offset line settings:
Echo type gives a choice of echo or echo clipped.
Echo clipped is a ripple effect. Echo will merge the object shape into the
frame shape. I’m using this Echo style as it lends itself to my blocks.
Bear in mind that minimise feed
only works on echo clipped. This setting will minimise the amount of stop/starts and cuts,
and will create a continuous run of stitching. I have selected Echo, as this
gives a nice quilt block effect.
Line sew type gives a choice between running, triple and chain stitch; chain stitch and stitch type; triangular or diamond effect; and size of chain (3-5mm). I’m using the chain stitch with diamond effect, leaving it at the pre-set 4mm size.
Run pitch - the length of stitch.
Run time - choose between 1-5 runs around the stitches. Running
stitch only.
Once complete, save to your device, then return to the design, select the background fill area on the design area, the echo fill stitching is then selected in the stitch order on the right side of the screen, click on the scissors which will remove the selected stitching from the design, then select the background fill wizard again.
Once complete, save to your device, then return to the design, select the background fill area on the design area, the echo fill stitching is then selected in the stitch order on the right side of the screen, click on the scissors which will remove the selected stitching from the design, then select the background fill wizard again.
Stippling fill

Spacing settings:
Offset spacing - the distance from the object to stippling. I’ve selected 4mm.Stippling settings:
Run pitch - the length of the stitches (the longer the
stitch length the more angular the stippling will appear) best to leave at
default.
Stippling
spacing - the
concentration of the stippling. The
smaller the number, the closer the stippling, which will allow a trapunto
effect on the central object if wadding is added. I’ve selected 8mm to
balance with my echo design.
Save
to your device with a new filename via the PED11 icon in the top left corner and return to a
blank background, ready for the next block.
 Decorative fill

Spacing settings:
Offset spacing - the distance from the object to the first line of decorative fill. Again, I’ve chosen 4mm.
Decorative fill settings:
Click on the folder icon or pattern thumbnail where a new menu will appear. There are 54 decorative fill patterns to choose from including fish, roses, leaves, geometric, shells, crazy paving - you name it! Here you can also change the size of the fill. I’ve chosen fill pattern 004, with the size changed to 120mm.
Minimize feed - this will minimise the amount of stop/starts,
cuts, and will create a continuous run of stitching. I’ve left this on.
Exclude internal patterns - if this box is left unchecked it will
create a continuous background fill across the whole panel, even underneath the
central object. If ticked, it will leave remove any overlap of stitching. I’ve
removed it to make my central applique stand out.
Save the design with a new filename, then clear
the background fill ready for the last block.

Crosshatch/stripe fill
Spacing settings:
Offset spacing - the distance from the object to the first
line of fill. I’ve selected 4mm.
Fill type settings:
Fill type - crosshatch or stripes. I’ve selected
crosshatch.
Size - the distance between crosshatch or stripes,
I’ve selected 15mm.
Direction - the orientation of the lines, with a full
360 degree spectrum. I’ve left at pre-set 45 degrees.
Exclude
internal patterns - if this
box is left unchecked it will create a continuous background fill across the
whole panel, even underneath the central object. If ticked it will leave remove
any overlap of stitching. I’ve removed it to keep continuity between my blocks.
Save with a new name, then select each design, right click and select Send To USB, ready
to transfer to the embroidery machine.
Having used the
wizard I recommend the following points to consider:
- Each time you make a change you must press Update Preview in order to observe the changes on the preview screen.
- If more than one object is used for the central design, the background fill will do its very best to fill every space in the fabric. For example, if I added more shapes, you can see how the echo recognises each individual shape.
- The image in the fill wizard thumbnail uses a heart as its example in the settings, even if you use a duck, a gingerbread man, Santa or lettering!
- The Echo block with diamond chain stitch had a very long stitch time of 56 minutes. It is shown within the software how many stitches are going to be performed (which will give an indication of stitch time depending on your chosen embroidery speed). The other blocks were only 7/8 minutes stitch out each.


I am really pleased with the results and enjoyed getting to know the software. I feel confident that I can start to experiment with the Applique Wizard next, and the Cutwork Wizard looks really interesting.
 Each block I
stitched out has polyester wadding with cotton lawn as top fabric and backing. I
used a selection of Japanese prints from Japan Crafts as my central appliqued
shape.
Each block I
stitched out has polyester wadding with cotton lawn as top fabric and backing. I
used a selection of Japanese prints from Japan Crafts as my central appliqued
shape. I also used Brother embroidery thread and Brother bobbin fill. After stitching out all four blocks I paired them up to create two mini quilted pillows, using more of the Japanese fabric for piping.
All in all, a great project that's set me up well for exploring more of PE Design 11. See you next time!
I'm new to all this,I have a brother V3,and love it,I,ll definitely be looking up all the hints and tips on downloads etc,thank you
ReplyDeleteThis comment has been removed by the author.
ReplyDeletei am impresseed ''https://windowsbay.com/pe-design-crack/''
ReplyDelete
ReplyDeleteGreat set of tips from the master himself. Excellent ideas. Thanks for Awesome tips Keep it up
PE-Design Crack
HitFilm Pro Crack
I like your all post. You have done really good work. Thank you for the information you provide, it helped me a lot. I hope to have many more entries or so from you.
ReplyDeleteVery interesting blog.
crackpur.info
PE Design Crack
I like your all post. You have done really good work. Thank you for the information you provide, it helped me a lot. suripc.com I hope to have many more entries or so from you.
ReplyDeleteVery interesting blog.
PE Design Crack
Contact:
ReplyDelete@killhacks = ICQ/TG
peeterhacks = Wickr/Skype
Tutorials, Tools & Fullz Available
C.C F-ullz with C.V.V & S.S.N Info
High-Credit-Scores F-ullz
D-umps with Pin-Codes Track-101&202
E.I.N Business F-ullz
S.S.N D.O.B D.L F-ullz/Pros/Leads
S.B.A/PU.A/U.I/Tax Return Filling f-ullz
Ethi-cal Ha-cking Complete Course with Tools & Tut-orials
Ca-rding Methods of Cas-hout & Transfers
S-pamming & Ha-cking Stuff Full Package
Kali-Linux-Master-Complete, BTC Crak-cer/Fl-asher
Combos, Mailers, Senders
I.p's/Proxies, Log-ins
E.t.c
Huge stuff Available now
Fresh & Valid, Invalid will be replaced
Contact for any query
I.C.Q = 752822040
T.G = @leadsupplier
Skype/Wickr = peeterhacks
Combination is great with PEDesign embroidery digitizing software and the Brothers' machine. Thanks to your beginners guide on PEdesign. Great job.
ReplyDeletelovely articles and nice designs.
ReplyDelete